

Introduction
We’ve all been there, you spend hours setting up a shot, tweaking the lighting, and making sure everything looks spot-on on your screen. But then you hit play on the final export, and the audio sounds hollow, distant, or completely buried under room echo.
The hard truth of digital content creation is that viewers will tolerate average video, but they will click away from bad audio almost instantly. That’s the major gap most standard tutorials miss. Everyone tells you which camera settings to use, but almost no one shows you how to capture clean, professional sound on a mobile setup without a Hollywood budget.
If you want your vlogs and YouTube videos to actually cut through the noise, upgrading your audio is the single most effective move you can make.
The BOYA Bluetooth Mic kit HOW-TO
This blog is a how-to on setting up a Bluetooth mic for your iPhone. I use it for vlogging and YouTube influencer videos. It’s easy to set up. I’m going to demonstrate, in a few steps, how to configure this microphone for your iPhone and record with it.
If you are in a hurry, jump to the bottom. I created a “60 second review”
1. Charge your bluetooth mic system
When you first unpack your new wireless mic, the first thing on your to-do list is giving it a full charge. The great thing about these setups is the charging case. You plug the case into a USB cable, and it charges everything inside at once. This is a lifesaver when you’re out in the field away from a power outlet—if your mic battery drops, you just pop it back in the case, close the lid, and let it juice back up.
” But learn from my mistake, because there’s a sneaky detail they don’t make obvious: the plastic film “
There is a tiny, clear protective film covering each charging connector. I completely missed this. I charged up the case, ran a quick audio test at the start of my session, and thought I was good to go but mics weren’t actually taking a charge just the case. They died completely mid-session! Save yourself the massive headache and peel those tiny plastic films off the connectors before you do anything else!

2. Assembling the iphone base station
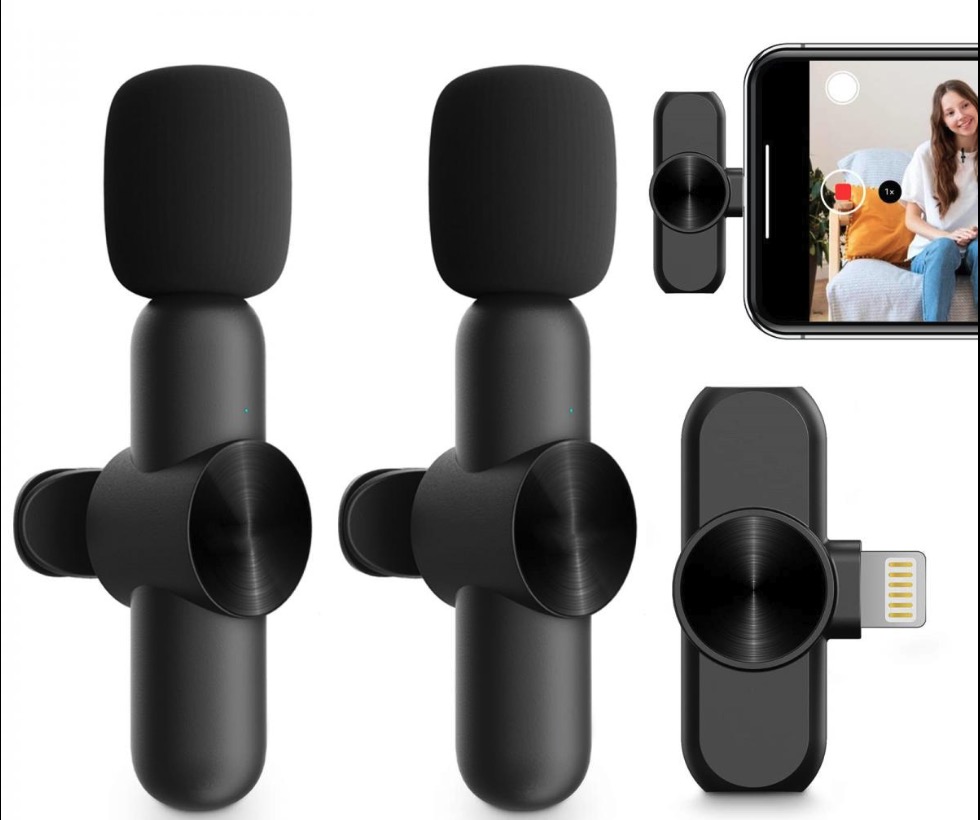
Next, slide the right adapter onto the BOYA base station. This base station acts as your actual receiver. Once you plug it into the bottom port, the phone automatically recognizes it as your main microphone connection.

As you can see in the above image, the system comes with swappable tips, so you can attach either a Lightning connector for an iPhone or a standard USB-C adapter. While this mic system works perfectly fine with Android devices too, I’m focusing on the iPhone setup here since it’s the standard so many of us use out in the field.
3. connect the base station to the iphone

4. select airplane mode on your home screen

Besides reducing the risk of a notification appearing on the camera screen while you are attempting to record, another lesser-known benefit is that it shuts down background cellular and Wi-Fi data processing. On older or heavily loaded smartphones, turning it off frees up your phone‘s processor to focus entirely on encoding your track
5. recording a 10 second test sample

I can tell you that many a content creator has had the experience of not turning on their mic at least once, and if all other basic tech stuff has been done, they have not tested the mic placement to see if it was picking up enough of the source.
6. Play back your sample

You need to play it back, listening objectively to its quality and making sure there are no obvious noise or technical issues, such as loud background noise or hums.
60 second review
- Charge the System: Remove the hidden clear plastic films from the microphone connectors, pop them into the charging case, and plug the case into a USB cable.
- Assemble the Receiver: Slide the appropriate smartphone adapter (Lightning for iPhone or USB-C for Android) directly onto the BOYA base station.
- Connect to Your Phone: Plug the assembled base station straight into your phone’s charging port. The device will automatically select it as your microphone.
- Enable Airplane Mode: Swipe into your phone’s settings and turn on Airplane Mode to prevent notifications from interrupting your recording and to free up processor power.
- Record a Test Sample: Record a quick 10-second test clip to ensure your mic placement is right and everything is picking up clearly.
- Verify Audio Quality: Play the sample back and listen objectively to check for any clipping, background hums, or unexpected technical issues before starting your main shoot.
BONUS BOYA VIDEO demonstrations
For more details on BOYA equipment, I have included a link here to a user guide
COnclusion
At the end of the day, building an authentic online presence means making sure your audience can clearly hear your story. Transitioning to a dedicated system like the BOYA wireless kit is one of the fastest ways to elevate your content from a casual hobby to a professional-grade production. By taking the time to dodge simple pitfalls like forgetting to peel off those hidden plastic charging films, you save yourself from massive technical headaches and brutal reshoots down the road. Once you experience how easy it is to capture crisp, isolated dialogue directly into your phone, you’ll never go back to relying on your built-in microphone.

Comments and experiences welcome!
Over to you: Have you already made the jump to an external microphone for your mobile content, or are you still relying on your phone’s native mic? Drop a comment below with the gear you’re currently running, or let me know if you ran into any hiccups setting up your wireless kit. If this guide helped you out, pass it along to a fellow creator!
Leave a Reply